


Judging when the pots were ready
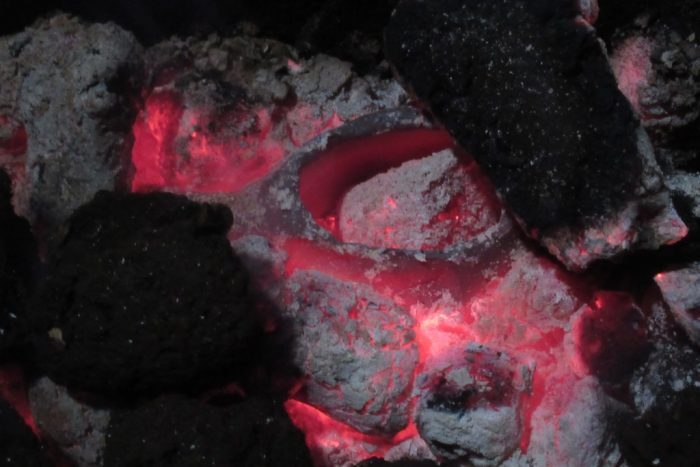
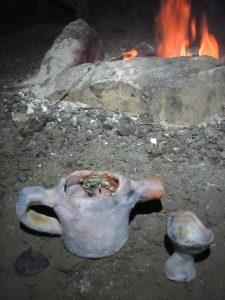
After about five and a half hours of our Barvas inspired pots being in the fire, I judged/guessed that they were “ready”. I could see that one of the teapots was glowing red, so it was certainly hot. I won’t hazard a guess as to a temperature though.
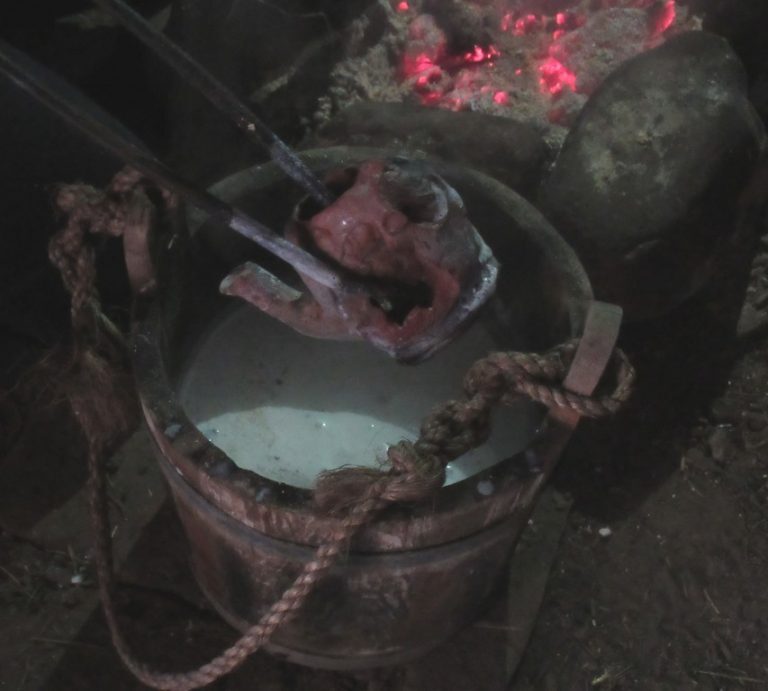
We used tongs to extract the pots from the fire, and then dunked them into a bucket of milk (full fat, of course) which had been warmed through slightly.
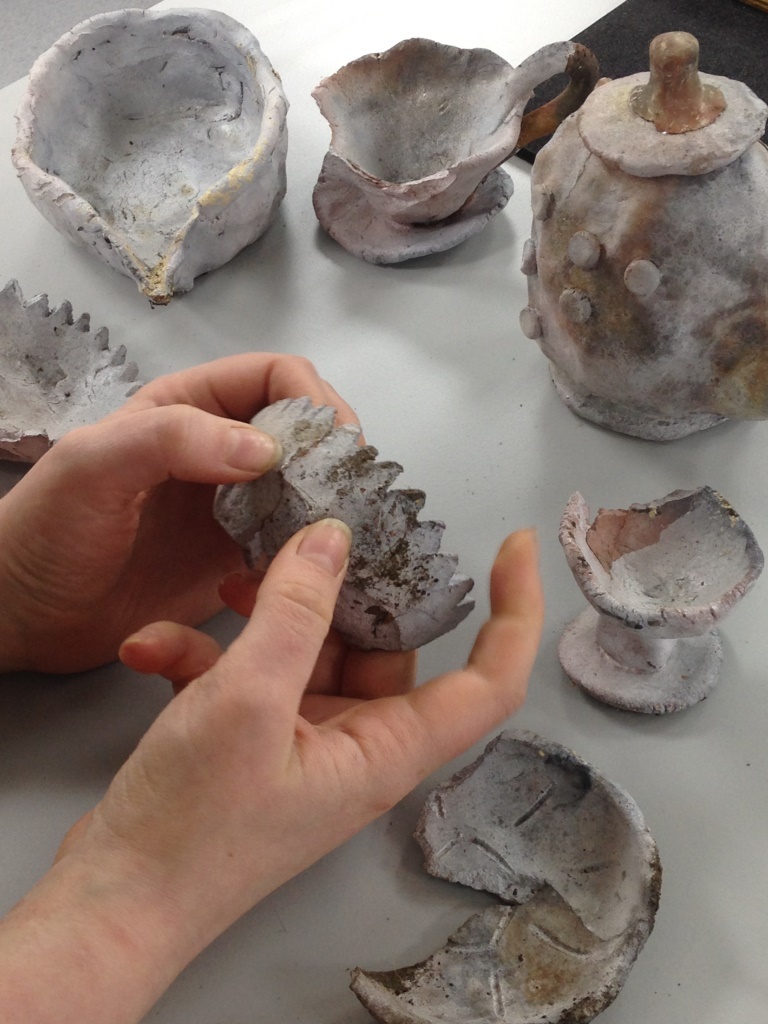
Breakages and early lessons
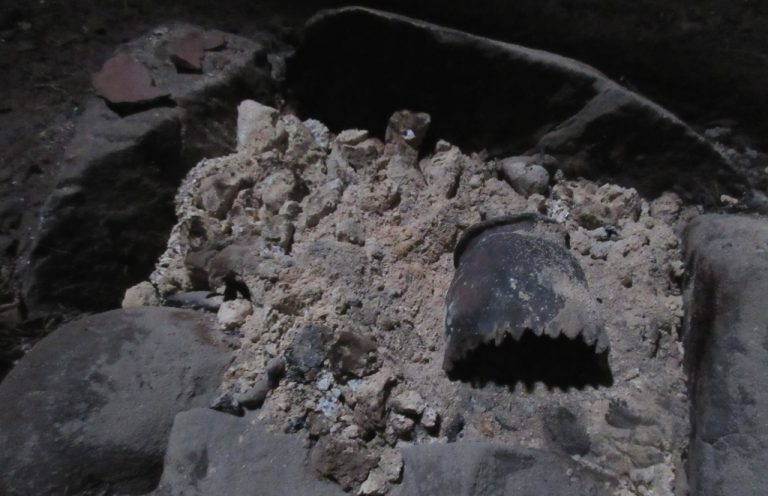
As you can see, quite a few of these pots broke during the firing. This isn’t so surprising, but the fact that any survived at all was a source of joy! I think that the most likely reason for breakages is from the initial thermal shock the clay goes through – quickly taking them from room temperature up to the intense heat caused by lighting the fires all around with firelighters and kindling is quite a thing to endure. Originally, the pots would probably have been placed in the warm embers of an existing fire, before having the fire gradually built up around them, resulting in a more gentle temperature increase. We realise firelighters wouldn’t have been used in 19th century Lewis, but this is all a valuable learning experience!
The milk glazing process
The milk glazing was a success, and certainly produced a white-ish coating on the surface, like the original Barvas ware coating. The hot pots bubbled and hissed when we placed them into the milk. One account of Barvas firing describes the “baptising of the cups”: “A big peat fire was prepared in the middle of the floor until the embers were red hot. The cups were placed in the fire until they became red hot. They were then lifted out and placed in a big basin of fresh milk. Seemingly this gave them a bit of a glaze and made them brown in colour. Lots of folk would come in to the house to watch that night” (1).
I can see why, as it is quite a spectacle! Our colleague Callum has kindly put together a wonderful film of the firings (and subsequent work in the lab) so you can see this for yourself.

Video Unavailable
Sorry, this video could not be loaded. Please try refreshing the page or check your internet connection.
Firing Barvas
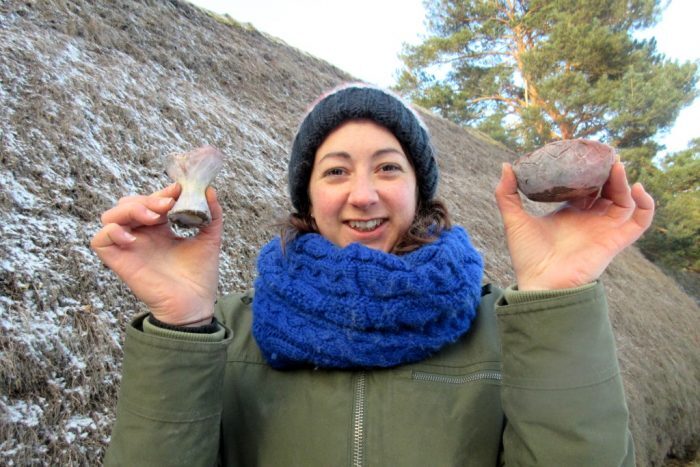
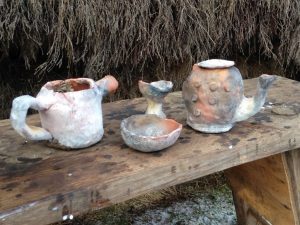
Some of the finished pots
A gentler overnight firing
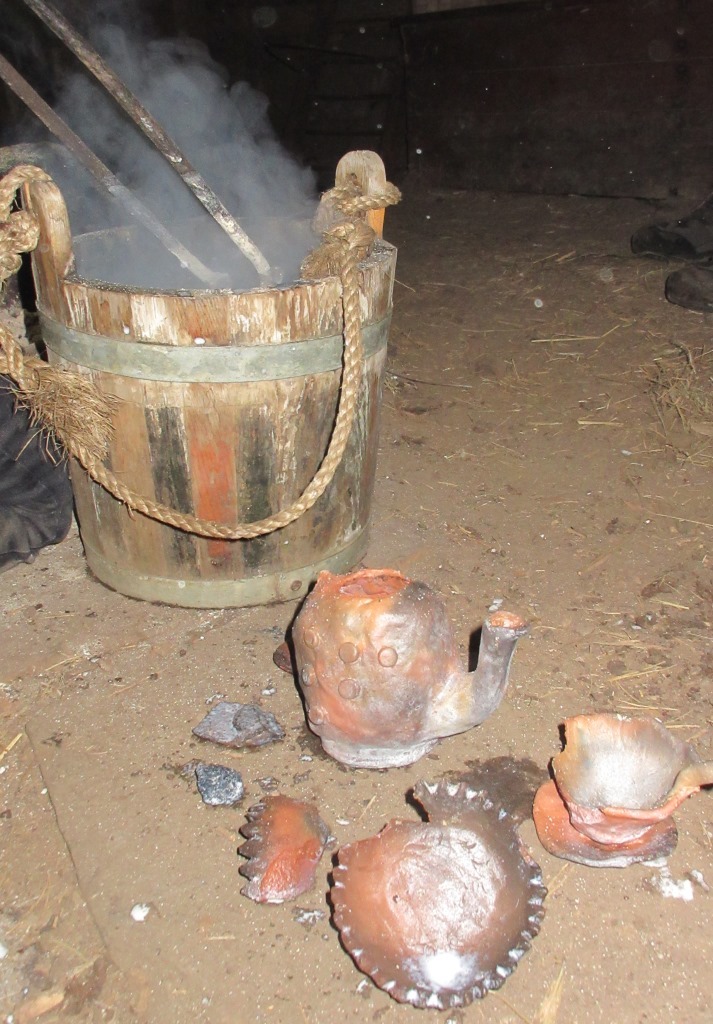
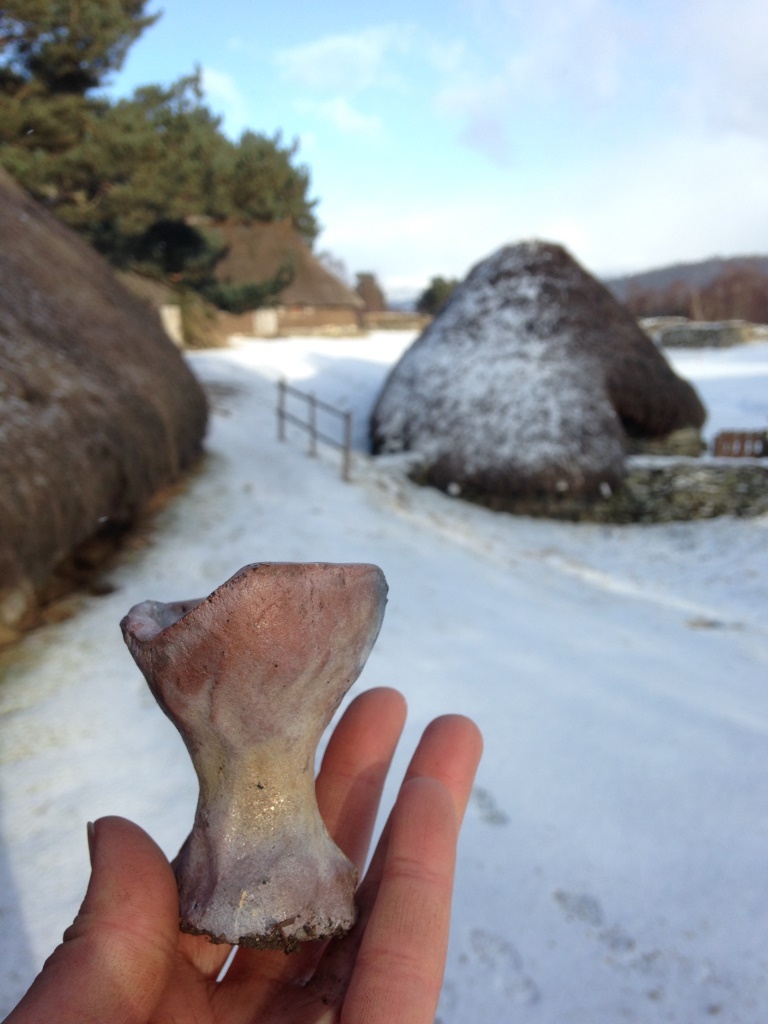
We had a third firing, where we placed some of the pots into the warm embers of one of the existing fires. We scattered more hot ash and embers over them so they were covered, and then left them overnight. When I returned in the morning, I found the pots in the ashes and they were fired and still hot, and unlike the other firings, were all in one piece and not broken. I think this can be put down to the long, gentle firing instead of going through the intense thermal shock of building the hot fire around them. They were warm enough to receive a milk glaze too, so they also have the characteristic white coating. As an interesting note, the white coating continued to develop throughout the day after the firing, so 24 hours later, they were much whiter when they had fully cooled down.
The overnight firing and the results

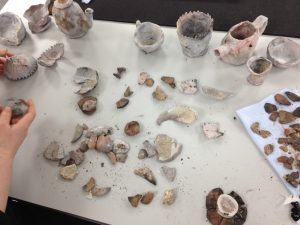
Reassembling the fragments
As you saw in the video, back in the lab, Rachael spent some time sifting through the ashes of the fires to rescue any sherds we might have missed. She then glued some of the pieces back together.
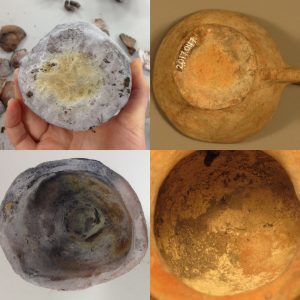
Sherds and pots. Note the difference in colour between pieces placed in the milk (white/grey) and sherds that didn’t go into the milk (brown/red/black)
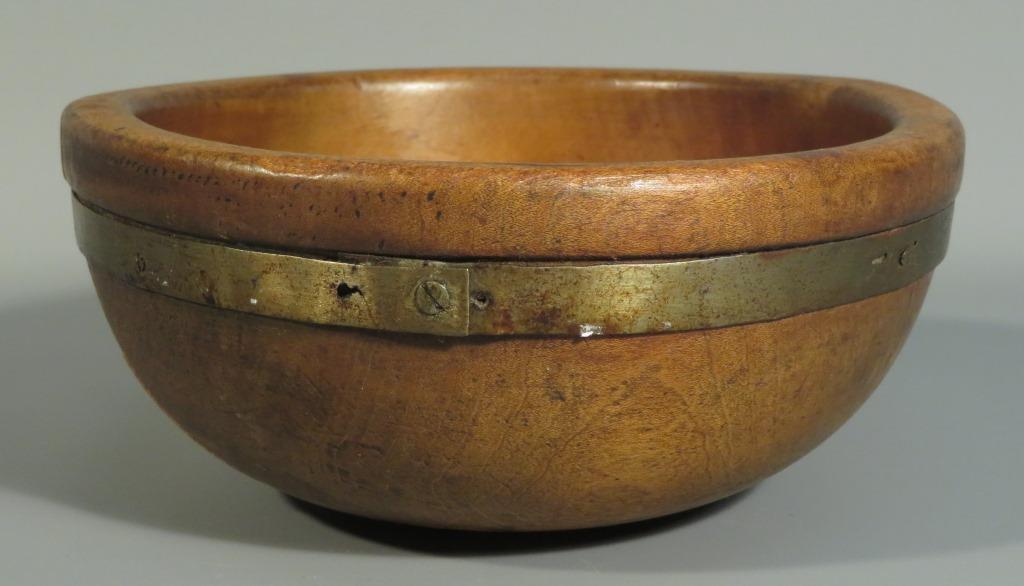
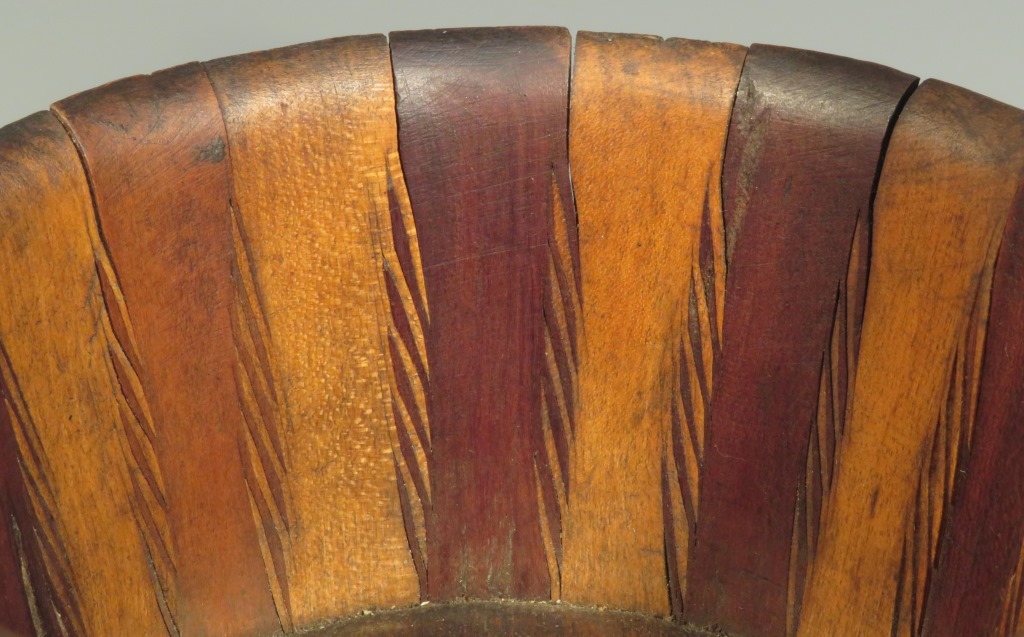
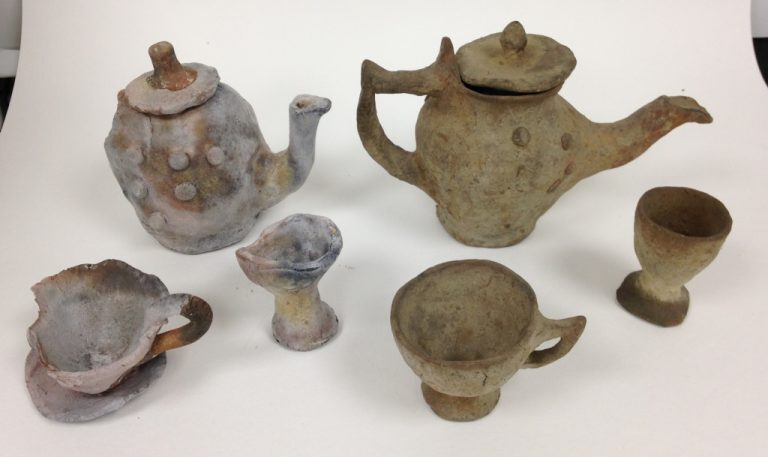
Comparing our results with original Barvas Ware
It’s really interesting to look at our pots side-by-side with the original Barvas ware.
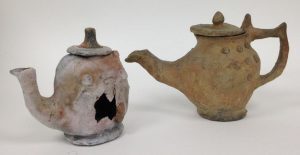
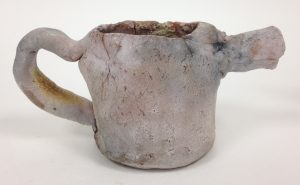
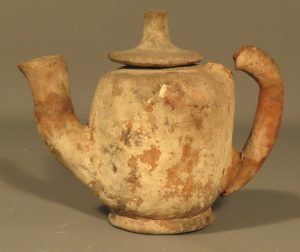
Rachael’s fabulous teapot next to the original. The hole appeared very early on in the firing; it probably exploded due to the concentrated heat on the relatively thin clay walls
Although there certainly are differences in overall colour and form etc, ours being a lot more white/grey/purple, there are many similarities too. On the original Barvas there are orange-y brown patches of the milk glaze in certain places, usually the underside of the pots, and we seem to have that on ours too. We also seem to have replicated the areas where the milk has pooled and is thicker and bubbled.
Left – our pots, right – the original Barvas Ware. Similarities in the milk glazed surface
Hannes’ teapot
An original Barvas teapot.
What we learned from the process
So, what can we conclude? Well, it’s harder than it looks to make a lumpy pot! Having tried this method of firing now, I’m really impressed that the Barvas ware was produced so consistently, and relatively even and uniform in colour, without the blackened areas and breakages like with ours. The less intense, longer firing worked better for us, with no breakages, but maybe the key is in how the pots initially heat up.
There are a lot of variables in this type of making, so it is very skilled to make a distinctly recognisable type of pot. I can understand why they gave the pots the milk coating, as actually it does create a sheen and would make the pots less porous, to a certain degree.
We ended up with some pretty great pieces of imitation Barvas ware. Although handles had fallen off, lids had shattered and holes had blown into the sides, going through the process of making and firing the ware was illuminating and highly enjoyable.
- Flora Macdonald, quoted in: Wilson, Kate. (2008) Barvas Ware: Women Potters of Barvas, Isle of Lewis, Outer Hebrides, Interpreting Ceramics, Issue 10, http://interpretingceramics.com/issue010/articles/02.htm, Accessed: 11/01/2018