My favourite items of treen that we have worked with on this project are the bowls and plates, of which we have 35 in the collection. Almost all of these items would have been made by turning on a pole lathe, and would have been very common within Highland households as ceramics and glass were more expensive and difficult to come by. Almost all of the bowls and plates that we have are smooth from years of use, with small cut marks due to food being cut up upon them, as well as burn marks on their outside surfaces where they’ve been kept too close to the fire. Not only do these objects show signs of use, but they also have many repairs on them, showing us that they would have been cherished and highly treasured family possessions to be mended rather than thrown away.
SFA.0019
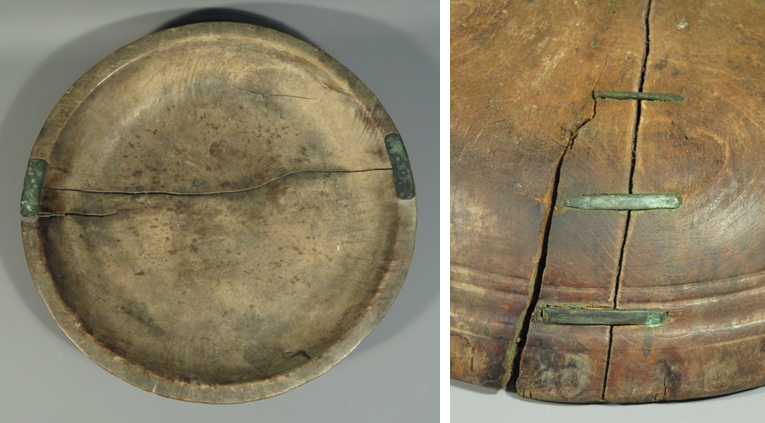
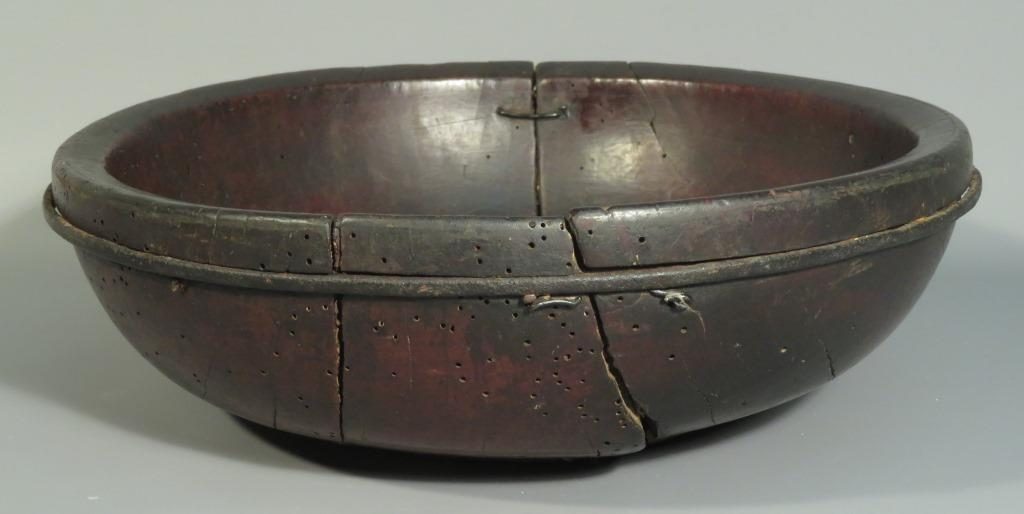
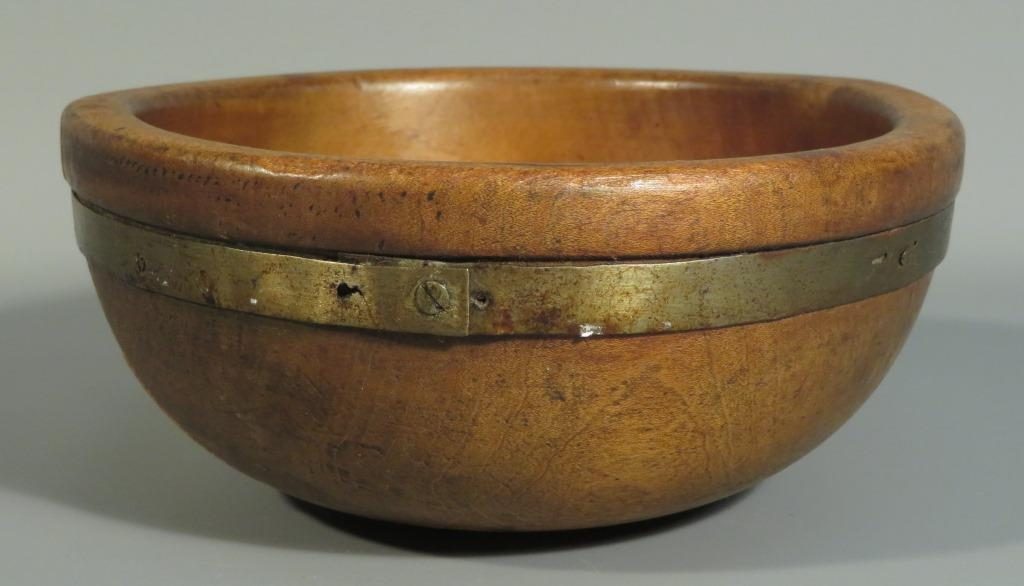
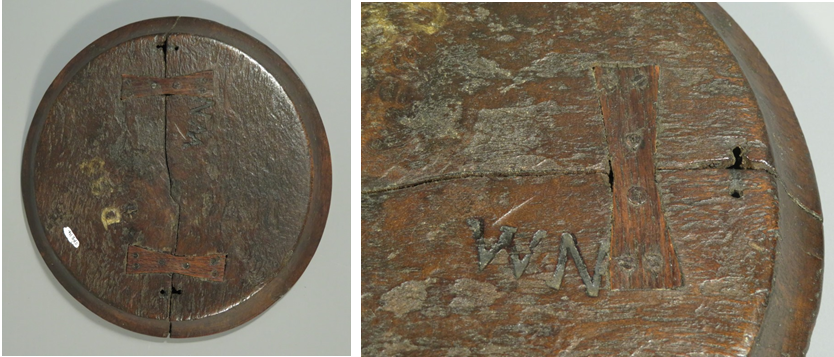
One of the most common methods of repair in the past has been staples, where a small bridge or loop of metal is inserted in to the surface of an object on either side of a break, ensuring that two pieces hold together. But sometimes this isn’t enough, and we have examples of where a metal hoop has been fixed around the exterior rim of a bowl, or where metal plates have been secured to the rim to prevent a crack from getting worse, or even use of a snaking metal thread running down the exterior surface of a crack to hold two sides together. But my very favourite repair has to be a butterfly join, where a new bow-tie shaped piece of wood is spliced in to the exterior surface of a plate, bridging the crack.
SFA.0013
SFA.0014

SFA.0032
K.SFD.0014
These beautiful old repairs are part of the object’s history and show us how precious an item would have been, as well as the methods at hand to mend items. Because of this we would never remove one of these repairs, however, sometimes we would consider removing more modern repairs because although people have the best intentions at heart, these repairs can be visually intrusive as well as cause more damage to the object than intended.
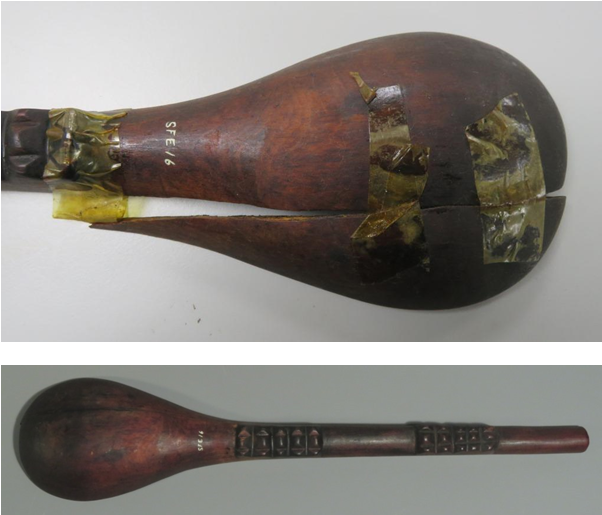
SFE.0016, before and after conservation
Take self-adhesive tape for example. It might seem like a great way to temporarily hold an object together before undertaking something more permanent, but the reality is that within museums an object can sit for years with tape on it before someone has time to work on it, and at that point the tape has yellowed, the adhesive has become difficult to remove with time, and what was meant as a quick fix has stained the surface of the object.
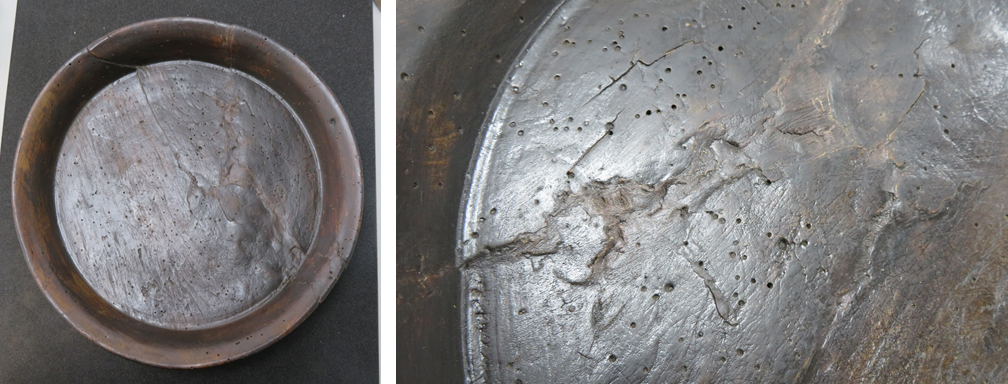
SFA.0021 before conservation, showing the uneven surface
One of our plates, SFA.0021, has been badly damaged by woodworm over time and as a result has broken in to many pieces. I have a note that it was repaired in 2001, but unfortunately no record was made of what material was used and there is no photographic evidence of the extent of damage or repair. When an object is broken in to so many pieces and repaired, it is common to end up with ‘cumulative error’, where the more misalignment you create the worse it gets, especially when the broken edges are powdery due to woodworm damage. To disguise this the previous repairer had smoothed many of the joins using plaster, colour matched with paint, but this created an unsightly and uneven surface and much of the original surface has been painted in an attempt to blur the line of repair. Because the overall appearance of the plate was distracted by the surface quality I decided that I would try and remove the old repairs, in line with a more ‘minimal’ repair style.

To repair this plate my first job was to take it apart. When choosing an adhesive today I would always opt for something that I know will be easily reversible in the future, even 100 years from now, but unfortunately the adhesive used on this plate wasn’t so easy to remove! First I placed the plate in a sealed polythene bag, along with a beaker of acetone, which slowly evaporates and softens the adhesive enough to gently remove it from the break edges using a scalpel. This revealed that large areas of the plate were missing and had been filled in using plaster, which again was removed with a scalpel. In some areas a thin surface layer of the plate remained attached to large chunks of old adhesive, and in these cases the old repair material was left alone for fear of damaging the original wooden patina.
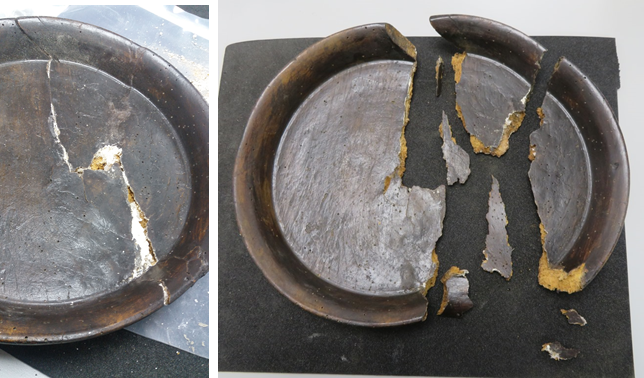
Revealing the extent of damage and plaster fill
To reassemble the piece I used a mixture of a conservation grade adhesive called Paraloid B72 and microballoons, which are tiny glass spheres that allowed me to ‘gap fill’ even where the joins weren’t totally flush due to previous damage. Because the purpose of this repair was to assemble the plate so that the overall size and shape could be seen, rather than for display, I decided against filling in all the broken areas and only used my adhesive mixture where a close join could be made. For storage I have secured the plate on to its own custom support, so in the future it can be easily lifted without causing any stress or strain to my repairs. My final task was to enter all of my repair details in to our museum database so that the materials I used are known and there is photographic evidence of what I’ve done. Now if anyone in the future wants to re-do my work they can feel confident that they’ll cause no further damage.
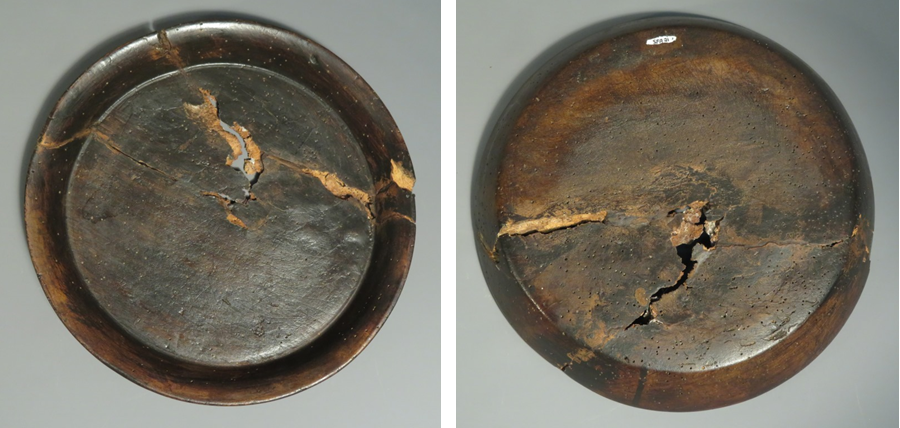
SFA.0021 after conservation
Rachael
Previous blog – What do we mean by treen?
Next blog post – That’s all folks!